This is part 1 of a series of posts documenting the HVAC repair on my 1986 Nissan 300ZX.
What’s done:
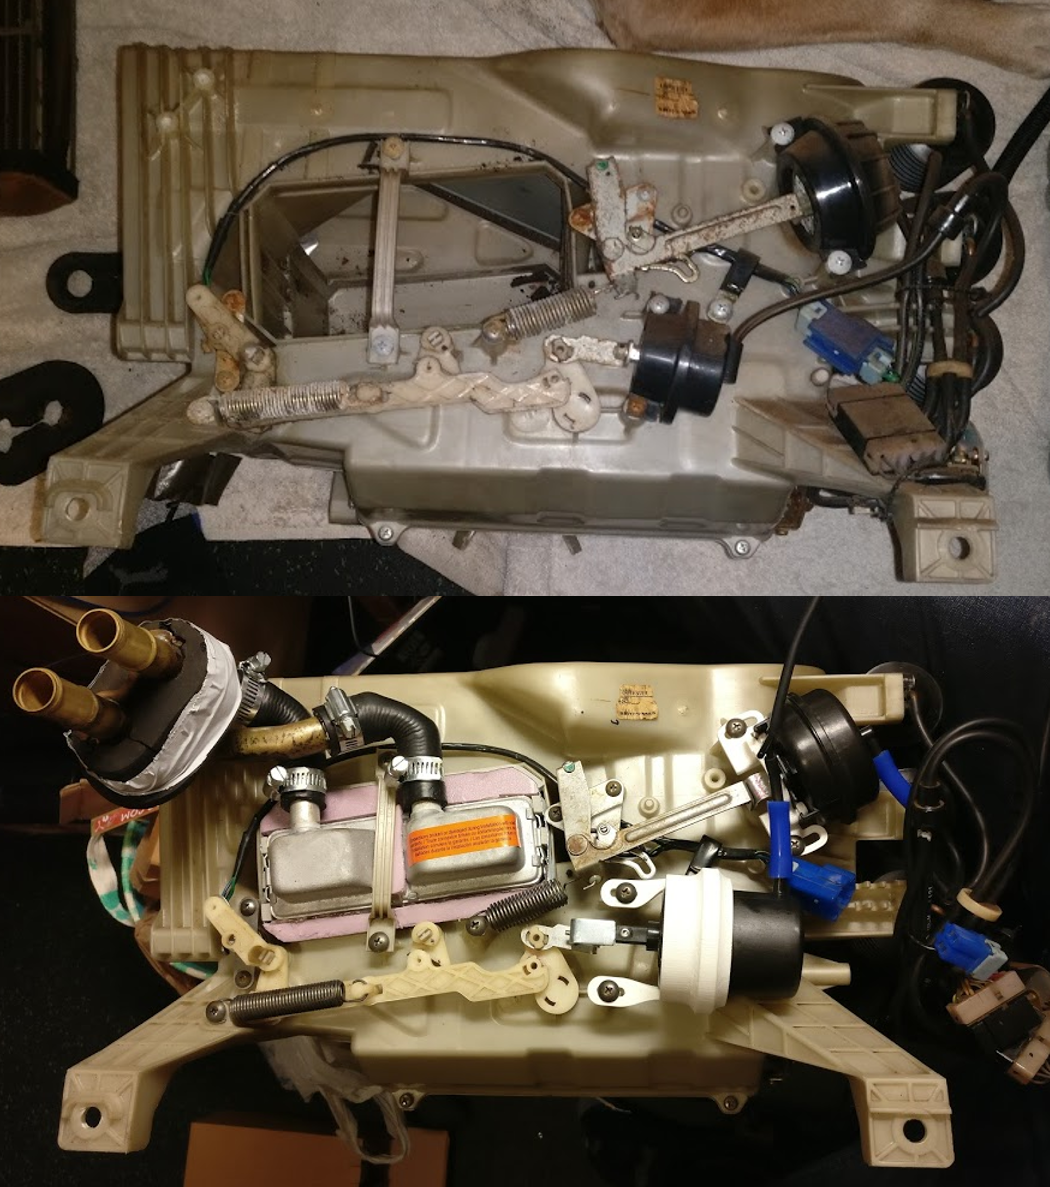
- Rebuilt heater core box and blower/air intake box. Currently they are back in the car but not the evap box, vents or dash. This involved replacing all 3 actuators with cheap aftermarket ones. The 3 bellows were still functioning.
- Disassembled/reassembled vacuum pump and vacuum tank and lubricated o-rings (ideally you should replace these)
- Replaced AC compressor
What still needs to be done:
- Rebuild evap (replace o-rings), put evap box back into car
- Replace o-rings on everything in the engine bay
- Charge AC system / final tests
Quick Background
My Z’s heater and AC didn’t work when I first got it. On top of that the thermostat got stuck at one point and ruptured a leak on the heater core. So until recently I had bypassed the heater core to prevent flooding my interior.
Since I live in TX I wanted A/C so I can drive the car any time of the year. But this car is R12/freon so first my plan was to replace all of the o-rings with HNBR so I could convert to r134a. Part of this job requires removing the A/C evap in the car to replace all of its o-rings. This requires removing the dash and all of the vents. While I’m in there I may as well fix the heater core. And on top of this, spoiler alert, almost none of the vacuum actuators were functional. So time to fix all of that.
The goal of this page is to 1) list out some of the aftermarket parts I used and how I made them work and 2) dump a lot of reference photos.
Parts & Costs
A large amount of the job was just dismantling, cleaning, lubricating, and reassembling. All of the old foam was either worn away or super brittle. I cleaned that off and replaced with various weather stripping foams from Walmart / Amazon (~$30).
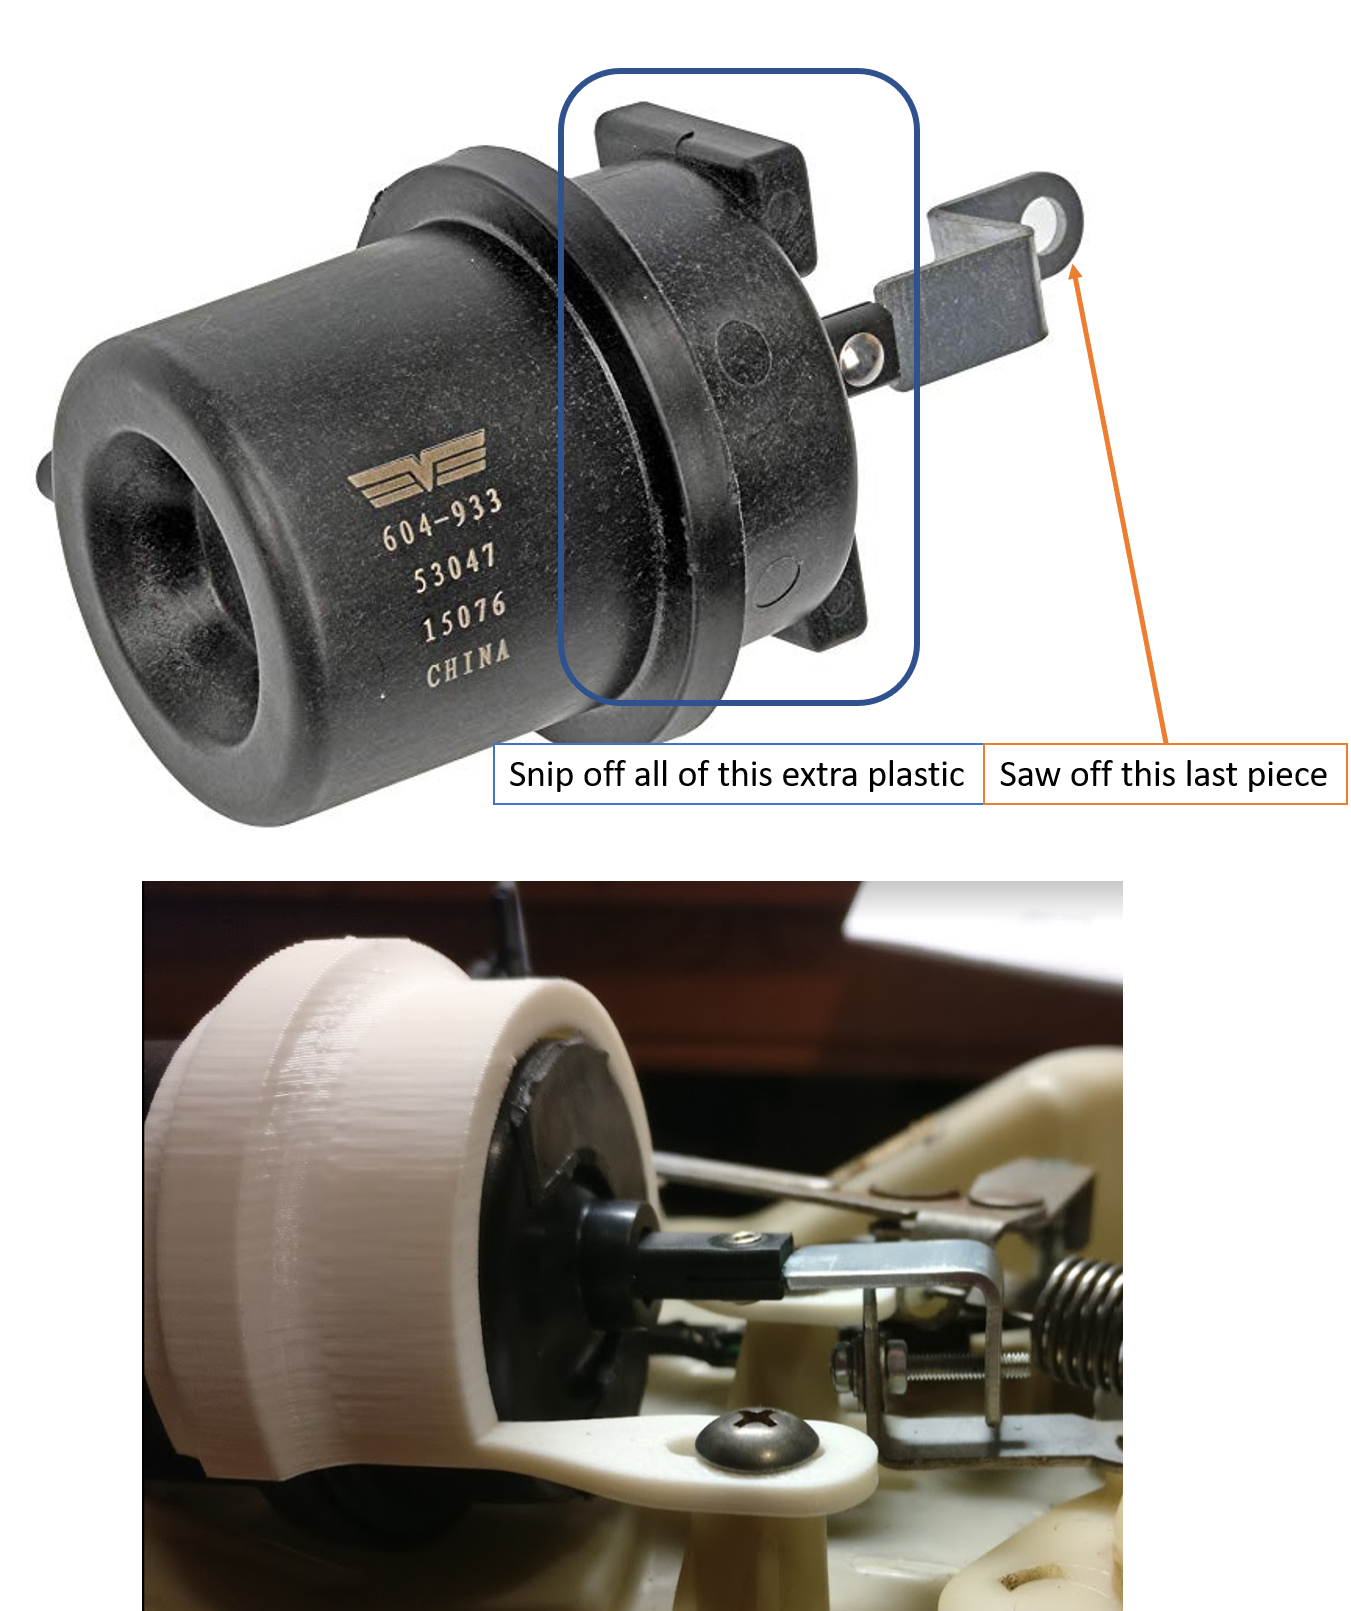
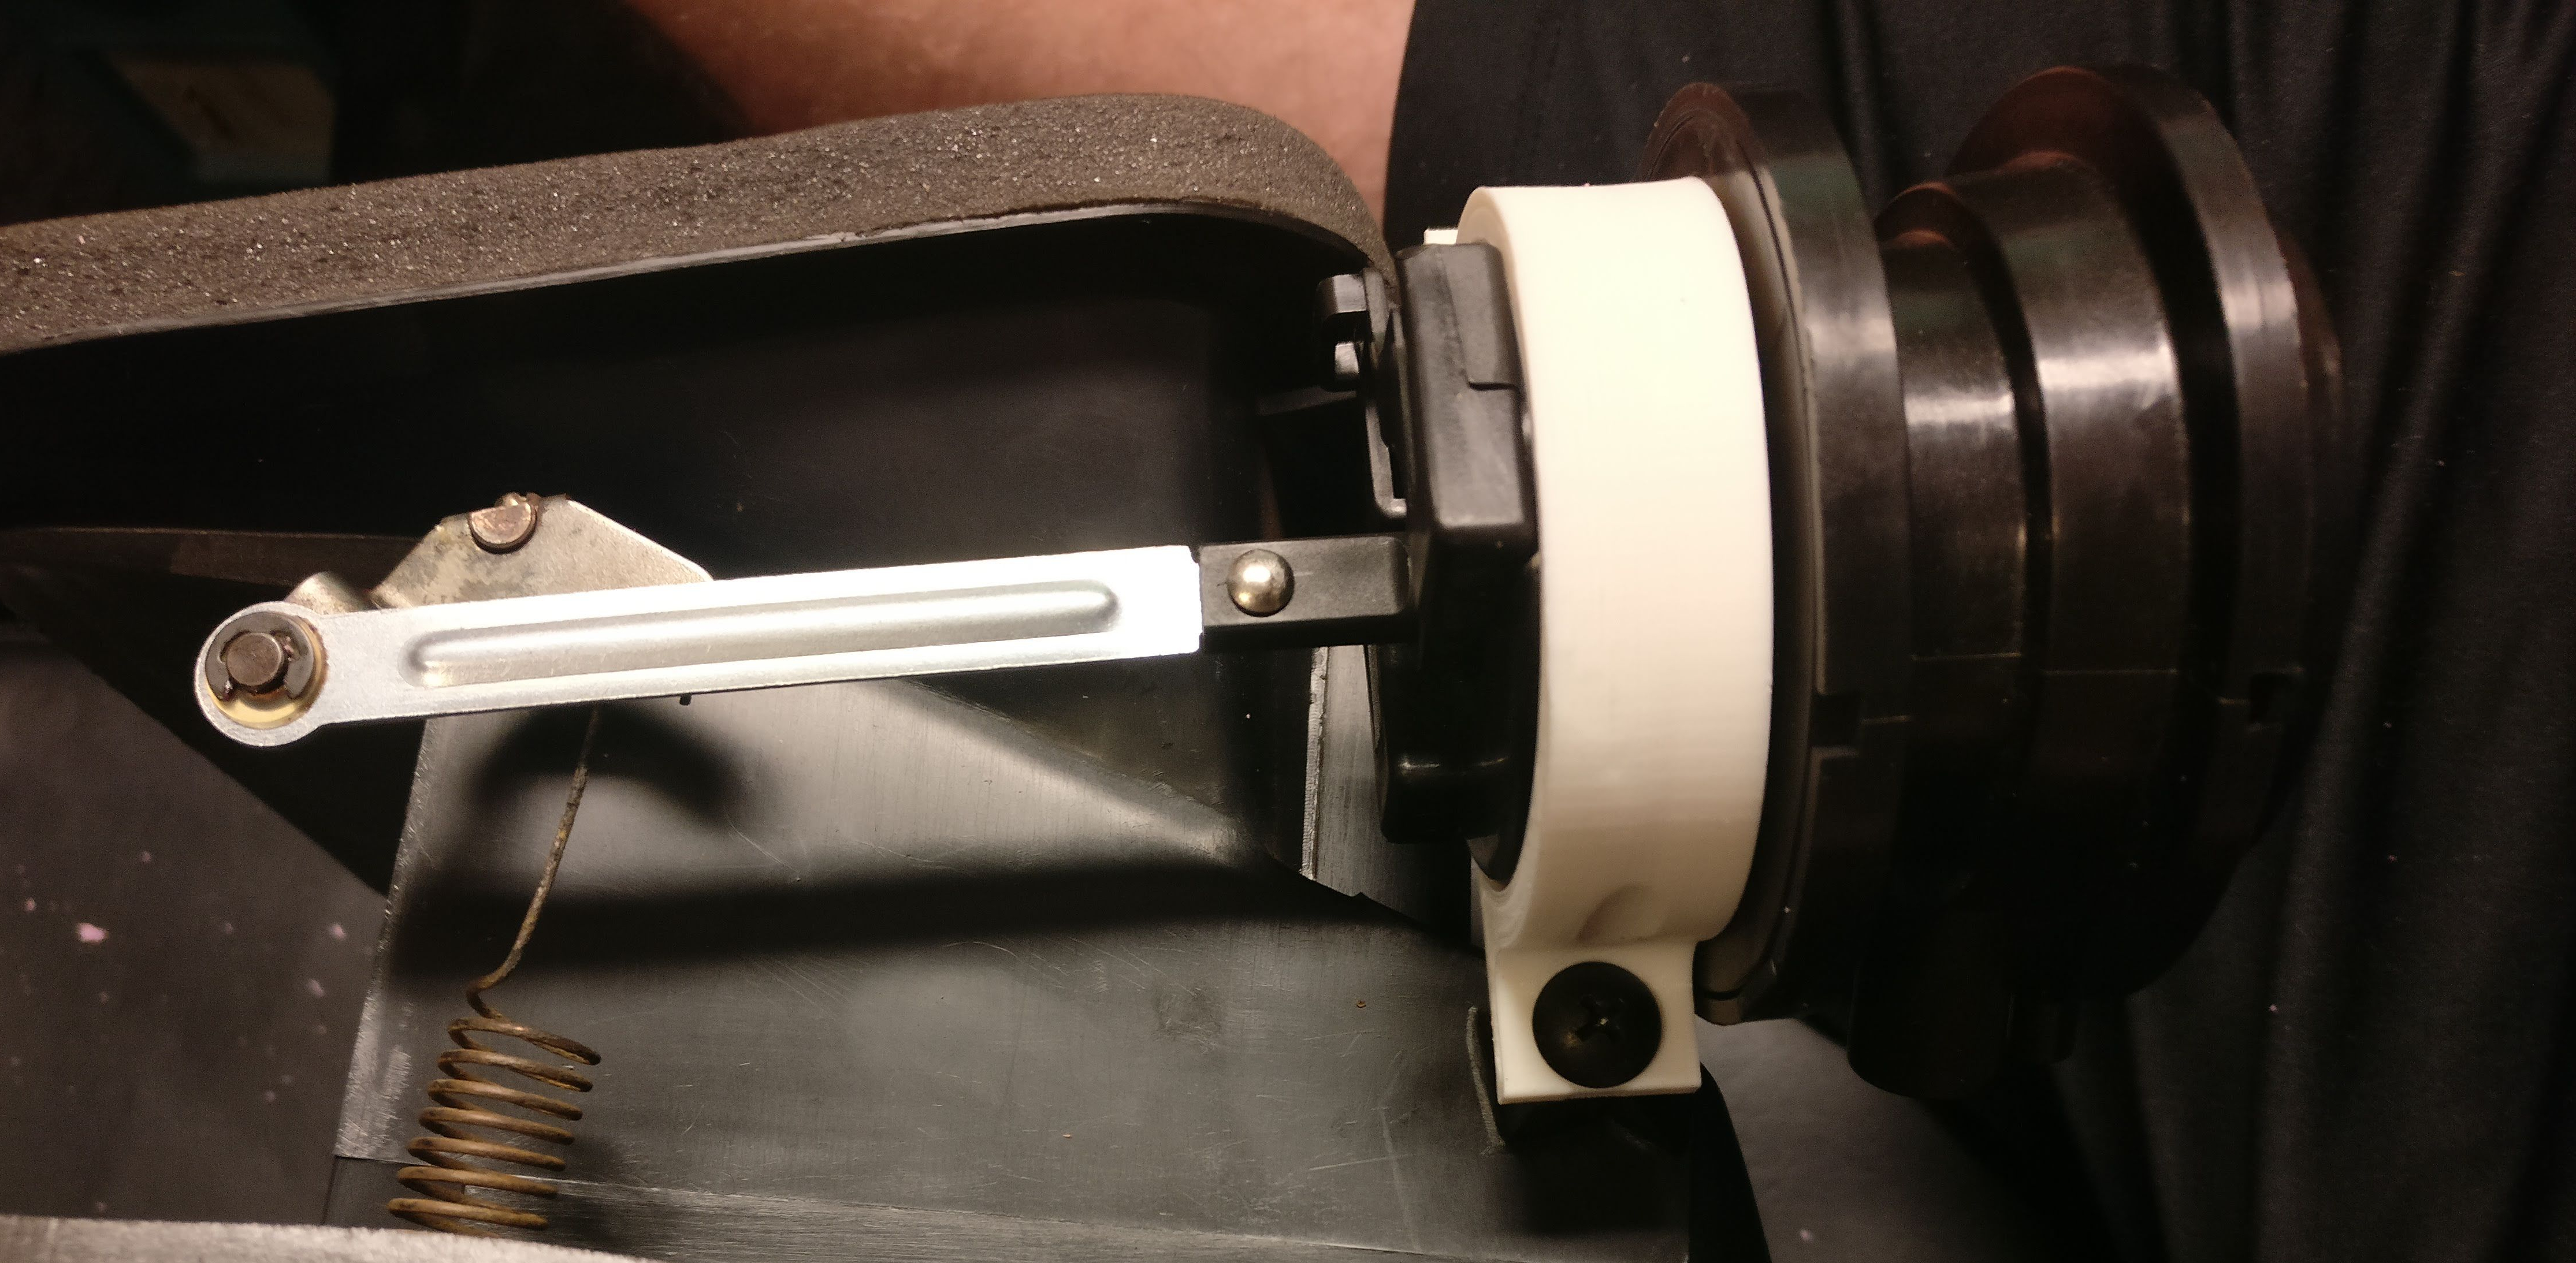
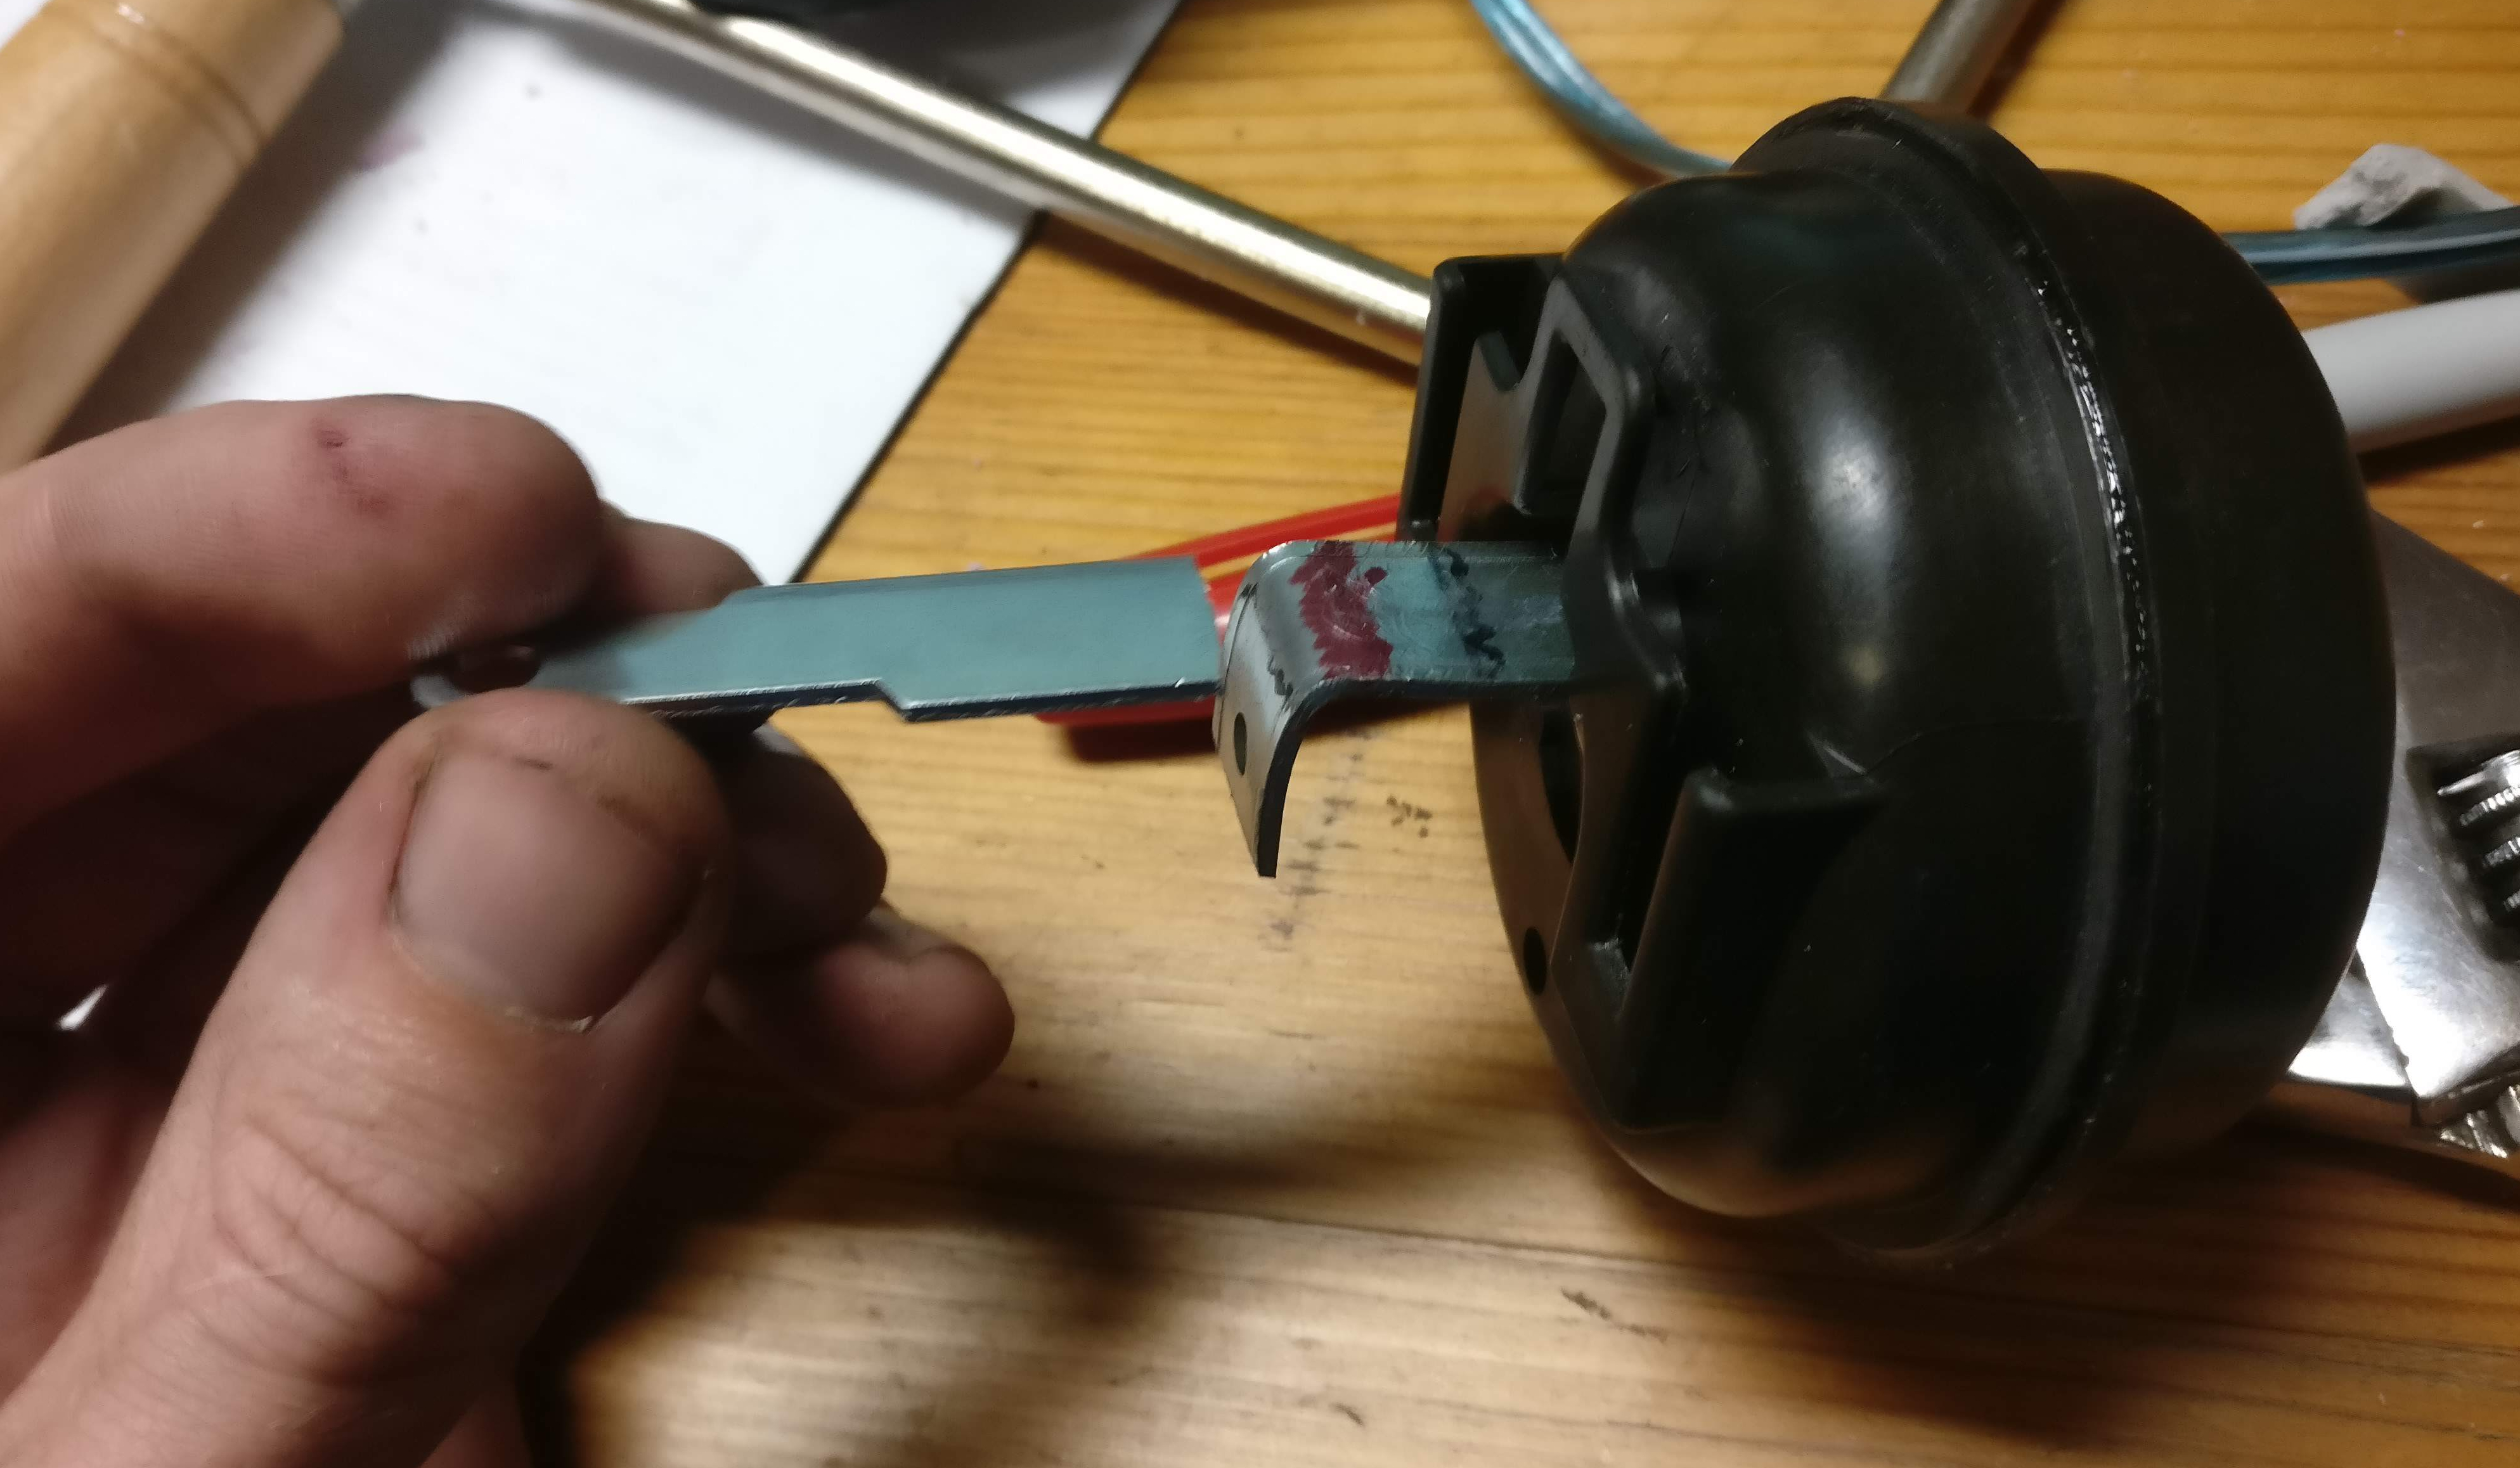
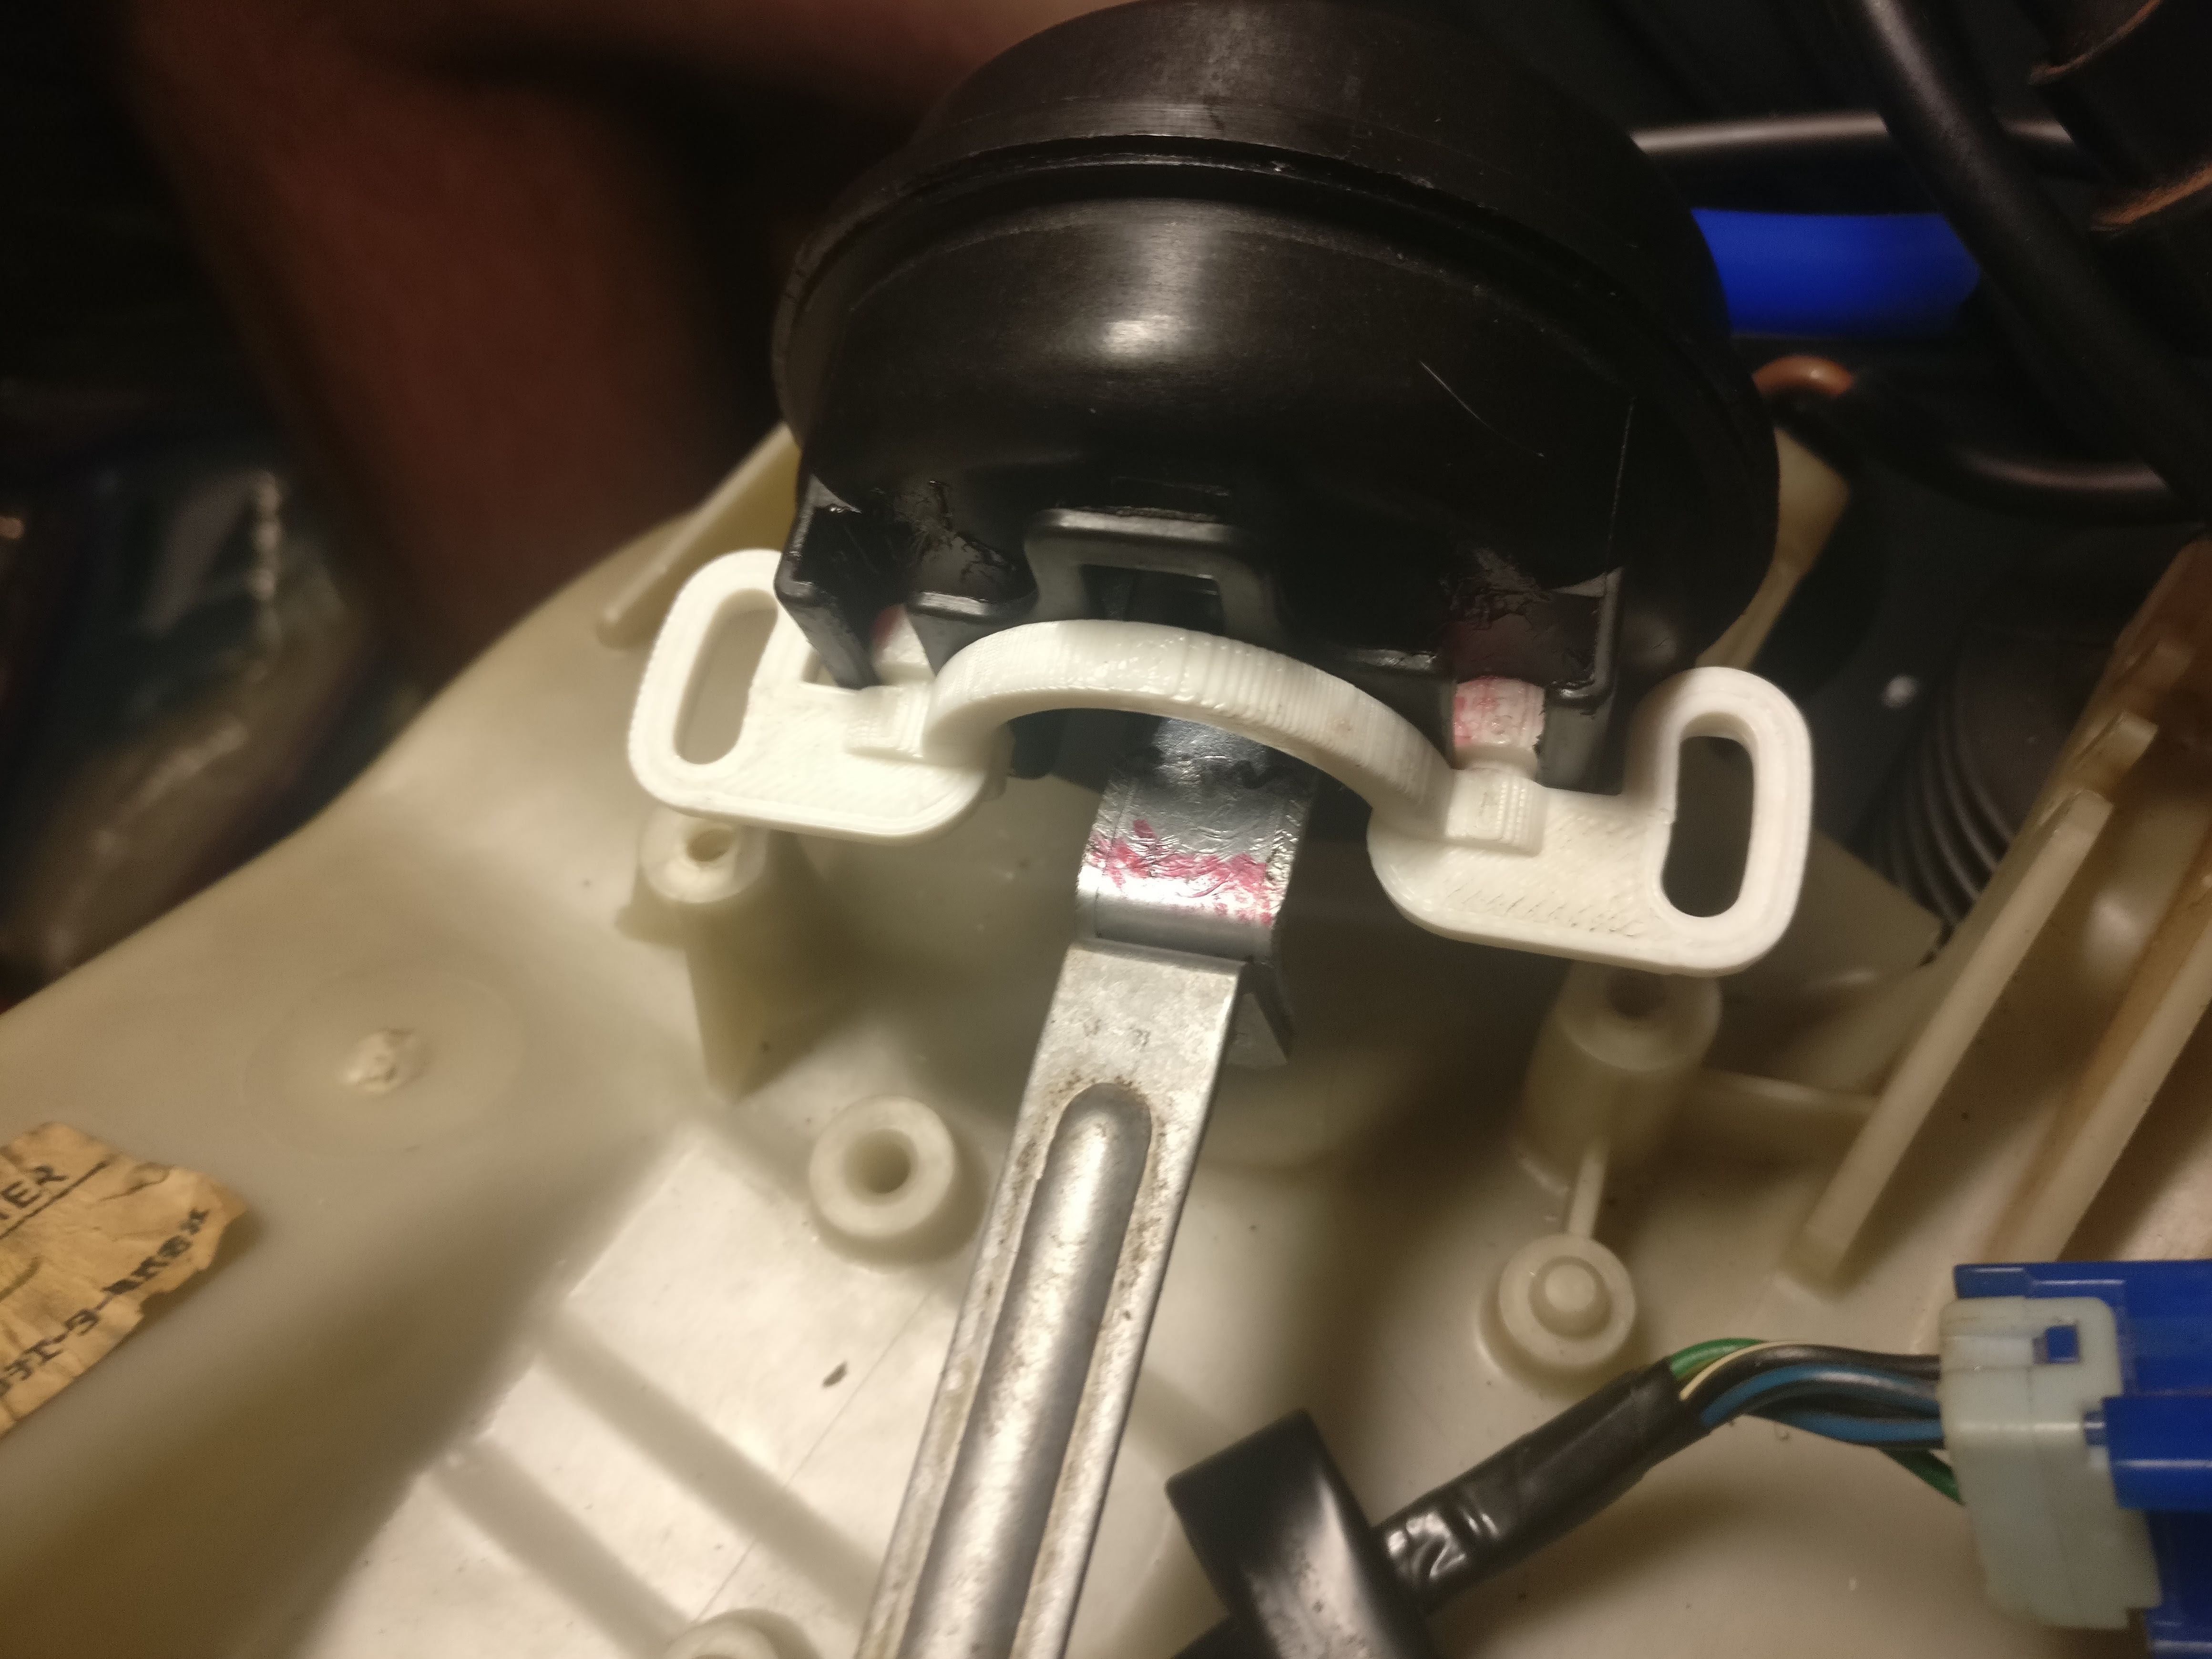
I purchased all of the cheap Dorman vacuum actuators I could find on Amazon to see what could work where. In the end I was able to make all 3 work without buying others. 2/3 were Amazon warehouse deals and extra cheap. Buying functional used OEM actuators is closer to $100/each. For all 3 I had to manually design and 3D print mounts. 2/3 required some physical modification (sawing linkage, bending, clipping plastic).
For o-rings: skip the RockAuto HNBR kit — it’s useless. Just buy a $5 Harbor Freight assortment. A few specific sizes you’ll need beyond that are from the O-Ring Store:
- 2x AS568-026 size
- 1x AS568-021 size
- 1x AS568-029 size (Viton, since HNBR minimum quantity was ~250)
For the heater core: I ended up returning the recommended $100 unit and using a slightly undersized Amazon one. Also bought a relief valve since the condition of the original was unknown. Used the majority of a 50ft roll of vacuum line.
| Item | Price |
|---|---|
| 57433 3Seasons/Everco A/C Compressor | $308.49 |
| XtremepowerUS Vac Pump and Manifold Gauge Set | $129.50 |
| Spectra Premium 94576 Heater Core | $33.32 |
| Various weather stripping foam | $30.00 |
| 50ft Gates 27041 Vacuum Hose | $23.47 |
| 12V Vacuum Pump | $20.95 |
| Dorman 604-934 Vacuum Style Air Door Actuator | $15.89 |
| SW 2155C A/C Receiver Drier Pressure Relief Valve | $15.82 |
| O-rings (AS568-021, AS568-026 x2, AS568-029) | ~$8.50 |
| Dorman 604-950 Vacuum Style Air Door Actuator | $8.30 |
| Dorman 604-207 Vacuum Style Air Door Actuator | $7.15 |
| Rough Total | ~$601 |
Note: The vacuum pump and manifold gauge set is optional but very useful for troubleshooting vacuum leaks. The vacuum pump alone is overkill — but useful for the evap o-ring replacement step.
Vacuum Actuators
The original actuators are all vacuum operated. The Dorman replacements are electric, so they need custom 3D printed mounts to interface with the existing linkage. The firmware for each is different — one needed a simple on/off while two others needed proportional control.
Heater Core Box Rebuild
The heater core box contains the heater core, a blend door, and the blower motor. All of the foam seals were crumbling. I sourced replacement foam from Walmart weatherstripping tape and cut it to size. The main challenge is getting a good seal without the foam being so thick it prevents the box from closing.
The blend door actuator mount required the most custom work — the Dorman unit has a different throw range than the original vacuum actuator, so the 3D printed mount had to compensate.
Downloads
Actuator Mount 1
Actuator Mount 2
Actuator Mount 3
Actuator Valve Mount
| File | Description |
|---|---|
| actuator-mount-1.stl | 3D printed actuator mount 1 |
| actuator-mount-2.stl | 3D printed actuator mount 2 |
| actuator-mount-3.stl | 3D printed actuator mount 3 |
| actuatorValveMount.stl | 3D printed actuator valve mount |
Reference Photos